Nov 23 2013

Too much steam in your anime?

Category: Anime,Overmix,Programs,SoftwareSpiller @ 03:54

Well, Overmix is here with a dehumidifier to solve your problem. Too damp? Run it once and watch as your surroundings become clearer.

Your local hot spring before:

and after:

Can’t get enough of Singing in the rain? Don’t worry, just put it in the reverse and experience the downpour.

Normal rainy day:

The real deal:

This is another multi-frame approach, and really just as simple as using the average. Since the steam lightens the image, all you have to do is to take the darkest pixel at that position. (In other words, the lighter the pixel is, the more likely it is to be steam.) Since the steam is moving, this way you use the least steamy parts of each frame to gain a stitched image with the smallest amount of steam.

If we do the opposite, take the brightest pixel, we can increase the amount of steam. That is not really that interesting, but the second example shows how we can uses this to bring out features that would otherwise be treated as noise. We could also combine it with the average approach using a range, to deal with the real noise, but I did this for fun so I didn’t go that far.

While this is a fairly simple method, it highlights that we can use multiple frames not just to improve quality, but also to analyze and manipulate the image. I have several neat ideas I want to try out, but more about those when I have something working.


Nov 09 2013

Colorspaces and VLC

Category: Overmix,Programs,SoftwareSpiller @ 21:23

There are two colorspaces commonly used in video today, which are defined in Rec. 601 and Rec. 709 respectively. Simply speaking, Rec. 601 is mainly used for analog sources, while Rec. 709 mainly is for HD TV and BD.

So how do VLC handle this? It assumes everything is Rec. 601 and you get something like this:

The bottom left is from a DVD and the top right is from the BD release. In comparison, here is how it looks in Overmix, using Rec. 601 for the DVD release and Rec. 709 for the BD release:

VLC also seems to ignore the gamma difference between Rec. 601/709 and sRGB, and it handles 10 bit content in a way that reduces color accuracy to worse than 8 bits sources. Behold, the histogram from a Hi10p source:

Free stuff might be nice, but this is what you get…

EDIT: I messed up the studio-swing removal in Overmix (which is now fixed), so the colors were slightly off. It was consistent between rec.601/709 so the comparison still holds. Overmix might be nice, but this is what you get…

Tags: , , ,


Nov 03 2013

First Super Resolution results

Category: Overmix,Programs,SoftwareSpiller @ 23:22

Just five months later… Here are some early results using artificial data.

Using Wikimedia Commons “picture of the day” for October 31. 2013 by Diego Delso (CC BY-SA 3.0), I created LR (Low Resolution) images which were 4 times smaller in each direction. Each LR image had its own offset, so to have one LR image for all possible offsets, 16 images was created.

To detect the sub-pixel alignment afterwards, the images were upscaled to 4x their size and ordinary pixel-based alignment was used. The upscaled versions were only used for the alignment and thus discarded afterwards. The final image was then rendered at 4x resolution using cubic interpolation, but taking the sub-pixel alignment into account. Lastly the image was deconvolved in GIMP using the G’MIC plugin to remove blur. The results are shown below:

Left side shows the LR (shown upscaled using Nearest neighbor interpolation) and original image respectively. Right side shows the SR (Super Resolution) results, using different interpolation methods. Both are cubic, however the top is using Mitchell and the bottom is using Spline. In simple terms, Spline is more blurry than Mitchell but has less blocking artifacts. Mitchell is usually pretty good choice (as it is a compromise between several other cubic interpolation methods), however the blocking is pretty noticeable here. Using Spline here avoids that and since we attempt to remove blur afterwards it works pretty well. However do notice that Mitchell does recover slightly more detail in the windows to the right.

But while Mitchell often does appear to be slightly more sharp, it tends to mess up more often, which can clearly be seen on the “The power of” building to the left. The windows are strangely mixed up into each other, while they are perfectly aligned when using Spline.

Conclusion

Results are much better than the LR images, however it is more an magnification of 2x instead of the optimal 4x. And to make matters worse, this is generated optimal data without blur or noise.

However this is the simplest way of doing SR and I believe other methods do give better results. Next I want to try the Fourier-based approach which is also one of the early SR methods. It should give pretty good results, but it is not used much anymore because it does not work for rotated or skewed images.

Using artificial data has really shown me why I have had so little success with it so far. I’m mainly working with anime screenshots and the amount of detail which can be restored is probably not that much. My goal is actually more to avoid blurriness that happens when they are not aligned perfectly. Thus while it should have been obvious, lesson learned, do not test on data which you are not sure whether will give an result or not… What I did gain from this is that anime tends to be rather blurry and that image deconvolution can help a lot. When I understand this blurriness in detail I will probably write more about it though.


Jun 07 2013

Overmix and Super Resolution?

Category: Anime,Overmix,Programs,SoftwareSpiller @ 22:43

As I was researching on digital signal processing I found an interesting term: Super Resolution. Super Resolution is a field which attempts to improve the resolution of an image, by using the information in one or more images. This is exactly what I was doing with Overmix, using multiple images to reduce noise.

However another aspect of Super Resolution use sub-pixel shifts in the images to improve the sharpness of the image. This could not only solve the issue with the imperfect alignment I was having, it could straight out improve the quality further than I had thought possible.

(I had actually tried to use sub-pixel alignment when I ran into the issue and I speculated it might could increase sharpness. But after much work I only managed to make it align properly without reducing the blur I was having even without it, so I didn’t press it further.)

Limits

Super Resolution has it limits however. First of all, as it tries to estimate the original image, it cannot magically surpass it and give unlimited precision. If the image was created in “480p”, even a 1080p BD upscale will still only give the “480p” image. If the original was blurry by nature, Super Resolution will result in a blurry image as well, unlike a sharpness filter.

And that raises the question, why is anime blurry and why does it not align on the pixel grid? With one sample, I got the same misalignment with both the 720p TV version and the 1080p BD version. If this was caused by downscaling the issue would be smaller at 1080p, however it isn’t. Most anime does not appear to push the boundaries of 1080p, but since there are misalignment issues I suspect their rendering pipeline isn’t optimal.

The other limit is the available images used for the estimation. If the images we have does not contain any hints on what the original image looks, we can’t guess it. Thus if there are no sub-pixel shifts in an image, Super Resolution can’t do much. And that is actually an issue because most slides only moves vertically which means we only have vertical sub-pixel shifts. In those cases we can only hope to improve detail in the vertical direction.

Using all available information

Since Super resolution uses the information in the images, the more we can get the better.

First of all, the closer we can get to the source the better, as we don’t have to estimate the defects that happens on each conversion. A PNG screenshot is better than a JPEG, and the TV MPEG2 transport stream is better than a 10-bit re-encode.

One thing to notice here is that the PNG screenshot is (with all players I have tried) a 8-bit image, not 10-bit (16-bit*) for Hi10p h264. So using PNG screenshots would loose us 2 bits.

However more importantly, PNG cannot represent an image from a MPEG stream directly. The issue is that PNG only supports RGB and MPEG uses Y’CbCr. Y’CbCr is a different color space invented to reduce the required bandwidth of image/video. The human eye is most sensitive to luminance and not so much to color, which Y’CbCr takes advantage of. MPEG then (normally) uses Chroma subsampling which is the practice of reducing the resolution of the planes containing color information. A 1280×720 encode will normally have one plane at 1280×720 and two at 640×360.

So to save as a PNG, the video player upscales the chroma planes and converts to RGB, losing valuable information.

Going even further, video is compressed using a combination of key- and delta-frames. Key-frames stores a whole image while delta-frames only stores how to get from one frame to another. The specifics about how those frames were compressed is again valuable information. (But I don’t know much about how this is done.)

Status of Overmix

Overmix now accepts a custom file format which can store 8- and 10-bit chroma subsampled Y’CbCr images. I created an application using libVLC that takes the output with minimal preprocessing  and stores it in this format. (It also makes it easier to save every frame in the slide.)

Overmix now only uses the Y’ plane to align on, instead of all 3 in RGB. My next goal is to redo the alignment algorithm. Currently it renders an average of all previous added images to align on, as otherwise the slight misalignment would propagate with each added frame. However I will try to use a multi-pass method now, where it will roughly align all images and then do a sub-pixel alignment on the images afterwards. Sub-pixel alignment will, at least in the start, be done by upscaling as optical flow makes no sense to me yet.

Then I need to redo the render system, as it is currently optimized for aligned images, and this will clearly not be the case anymore.

I haven’t worked on Overmix for quite some time due to University stuff, but the next three months I should have plenty of time, so hopefully I will get it done before that is over.

Tags: , , , ,


Feb 28 2013

Stitching anime screenshots in overdrive

Category: Anime,Overmix,Programs,SoftwareSpiller @ 00:44

I have been developing a new application named Overmix, which attempts to improve the quality of anime screenshot stitching. This article will shortly explain what stitching is, what issues affect the quality and how Overmix tries to fix those. At the end a short summery of the results for the current progress is given.

Background

One common animation technique is panning where the camera moves/pans over the image, showing only a part of it at a given time:

animation of pan shot

(Shot on YouTube: http://youtu.be/DsHjblyEG88?t=6m25s)

Very little movement actually happens during the shot, in fact only the mouth is moving (presumably to reduce animation costs). This makes it possible to combine the frames together to one large image, which is known as “stitching”.

Source quality

The issue is however that more often than not, the video quality isn’t that great. The video has been compressed and especially if the source is a TV-transmission or webcast, visual artifacts can be quite noticeable:

Example of noise artifacts

The two most significant artifacts with anime encodes is noise (shown above) and color banding/posterization (shown below).

Example of color banding

Reducing artifacts

A stitch is normally done by taking two frames, finding the offset between the two images and then soften the edges between the images to make the transition less apparent (which is usually done by applying a gradient on the alpha channel).

Since this is a time consuming process, as few frames as possible is used. The idea is to do the opposite, use as many frames as possible. The reason is that the artifacts are not static, for every frame they differ slightly. In result, every frame carries a slightly different set of information. The goal is then to derive the original information, based on this set of inconsistent information.

Just by using the average, we can get quite decent results:

Comparison between average and single

(Right is a single frame, left is the average of all unique frames.)

Results

Noise artifacts has shown to nearly disappear completely when simply averaging every frame with each other, even when the source has a significant amount of noise artifacts. Color banding is also reduced but with much more varying amounts.

Even with modern TV-encodes, stitches sees a significant improvement from using this technique and can visually be tell apart at normal magnification. Surprisingly, even when using good BD-encodes there is usually a slight improvement, but normally requires 2-4 times magnification to be noticeable.

It has shown that it often is not possible to make a perfect alignment when sticking to the pixel grid. This causes the images to be slightly more blurry than originally. It is an area which still requires work.

Using the average to derive the result is not always desirable, as the encode might contain information not related to the image. Such information could be subtitles, TV logos or simply errors in the source. See the following image as example, the most-right column of pixels was completely black and shows up as lines in the averaged image.

Stitched with Overmix

However the currently devised algorithms has a tendency to choke on the slight misalignment mentioned previously and cause unwanted artifacts. If this is solved best by fixing the misalignment or by improving the algorithm is up to discussion.

Binaries and source code

Overmix is licensed as GPLv3 and can be found here: Overmix on Github

Binaries for Windows 64-bit can also be found on Github here: Overmix releases

Tags: ,


Nov 03 2012

NXT console v0.1

Category: Lego,Mindstorms,NXC,Programs,SoftwareSpiller @ 20:27

A long time ago on Mindboards some talk was made about displaying text-output like how it is done in a console, but I never ended up writing any code. Since it have been quite some while since I last wrote anything in NXC, I did this as a quick brush-up project.

Supports scrolling up and down with the left and right button on the NXT, and supports the control characters ‘\n’, ‘\t’, ‘\a’ and ‘\b’. ‘\b’ only works on the text you are currently adding though.

Download:

NXT console v0.1


Jul 21 2012

IE10 flip ahead and standards

Category: Software,WebdevelopmentSpiller @ 23:13

According to within windows IE10 has added a new feature to simplify page navigation. It is called “flip ahead” causes the browser to automatically find the next page if you click on the right side of the page. (It also makes a fancy slide animation which I guess tablet users will enjoy.) To quote within windows: “There are no futile attempts at tapping tiny links or looking for “next page” links on a badly designed website.”

There were two kind of responses in the comments, the ones praising the feature and the ones noting that this feature have been in Opera for years. As a avid Opera user I of course know about this feature and have been using it for a long time. (The main difference is that Opera doesn’t do the fancy animation and have like 10 different ways of activating it.)

But I’m not trying to be a Opera fanboy and rant about IE copying this feature. Rather, I’m happy that they do and hopefully the other browsers will too. Because this is an awesome feature, well, when it works. Sometimes the page you end up on can be completely unexpected.  And that is the issue, it isn’t really that reliable, and it is not really that strange when you consider the implementation.

The way Opera implements it (and most likely also IE) is, according to users on the web, by using a list of words which are likely to be in links pointing to the next page (in several languages). So if it finds a link which matches one of those entries, it will use that as the next page.

So this works when the page uses something commonly like “next page”. However one specific site might use “more destruction” instead of “next”. Will it work now? Perhaps, but in that case, what if another site didn’t have more than one page but did have a link to a site called “More destruction”. You could end up on a completely unrelated site or page. Such cases could be fixed, but there will always be some other special case.

So as a webdeveloper you will either have to carefully test the site in IE (and risking different behavior in Opera), or wait for some way or standard to specify the next page with some form for meta-data. Within windows says to lurk on the IE blog for tips on tailoring your site to this feature, however there is no need to wait on the bloging about it because there already is a way to specify this. Actually, it have been there for about 15 years, it is a part of the HTML 4 specification. It is a single element placed in the HEAD: [Document relationships: the LINK element]

<LINK rel="Next" href="Chapter3.html">

Lets quote the spec: “Next Refers to the next document in a linear sequence of documents. User agents may choose to preload the “next” document, to reduce the perceived load time.” Seems like it took the IE guys 15 years to notice this…

So why do browsers guess? Because way to many sites does not provide this information. And worse yet, a lot of people got it wrong, so several aliases was added to the HTML5 spec… (and I therefore recommend you to use the HTML5 spec as a reference to this instead.) Opera does support it, but because of the amount of websites that doesn’t provide it, the feature still seems shaky at best. Now when a bigger browser like IE gets support hopefully this will change, but it will still take time before the majority of websites adds it. And the “poorly designed” websites Within windows mentioned might never do it…

To conclude this rambling: It (again) saddens me to see the state of the web today.

EDIT: seems like MS really wants to try the impossible and get it working on all sites, just hear this: “Using Flip Ahead requires end user opt-in, and sends your browsing history to Microsoft to improve the quality of the experience.” [Web browsing in Windows 8 Release Preview with IE10]


Jun 23 2012

Image comparison with CSS

Category: Software,WebdevelopmentSpiller @ 16:07

As I’m browsing the web I sometimes tend to look at the source of the webpages and if it is questionable I consider how this could be improved. However at times it is just to painful to watch…

This website was reviewing Blue-Ray releases of TV broadcasts and showed the differences by overlaying screenshots from the TV and BD versions. When you hovered over them with the mouse, the image switched. This was implemented like this:

<style>
  .himage
  {
    -webkit-transition: opacity .4s ease-in-out 0s;
    -moz-transition: opacity .4s ease-in-out 0s;
    -o-transition: opacity .4s ease-in-out 0s;
    transition: opacity .4s ease-in-out 0s;
  }
</style>
<div style="position:relative;">
  <img src="http://i.minus.com/j5BVlrAz0767W.jpg" width="640" height="360" />
  <img class="himage" src="http://i.minus.com/j0KF3taUebpkC.jpg"
      width="640" height="360" onmouseover="this.style.opacity=0;"
      onmouseout="this.style.opacity=1;" style="position:absolute; top:0; left:0;"
    />
</div>

Instead of having the CSS in the style sheet as it should, it is unneeded repeated like this for every image. It also uses the style attribute on the elements which is also considered bad practice. (XHTML 1.1 actually deprecated it, but nobody uses that anyway…) I don’t see why you would use JavaScript here either when it is just a simple hover effect.

The HTML can be much simpler:

<div class="himage">
  <img src="http://i.minus.com/j0KF3taUebpkC.jpg">
  <img src="http://i.minus.com/j5BVlrAz0767W.jpg">
</div>

As you can see, the only requirements to do this in CSS is a container and a way to identify this container, here done with a class. The CSS is much the same, just not done as attributes:

.himage{ position: relative; }
.himage img{
  -webkit-transition: opacity .4s ease-in-out 0s;
  -moz-transition: opacity .4s ease-in-out 0s;
  -o-transition: opacity .4s ease-in-out 0s;
  transition: opacity .4s ease-in-out 0s;

  opacity: 0;
  position:absolute; top:0; left:0;
  max-width:640px;
}
.himage img:first-child{
  opacity:1;
  position: relative;
}
.himage:hover img{ opacity:1; }

There are some differences however:

  • The JavaScript have been replaced with the :hover selector (which is the last line).
  • Instead of specifying a fixed width and height, max-width have been used. The browser automatically resizes it to keep aspect ratio. (which was slightly wrong btw…)
  • To keep the HTML as clean as possible, the :first-child selector was used to differentiate the first and second img element. :last-child would have made the CSS simpler, however it is not supported in older versions of IE.

Live versions

You can watch the two versions here:

Note: The CSS is included in the HTML for ease of distribution, it should of course be in the style sheet.

Edit: My version behaves a bit differently, the hover area is the whole div and not just the img, if you want the same effect change .himage:hover img to .himage img:hover.

Compatibility

I cannot currently test it in IE7 and IE8 (and I don’t care about IE6), however I think it should work if you take the following in account:

  • The :first-child selector is supported from IE7, but not on content which have been inserted with JavaScript.
  • opacity is not supported in IE5-8, you will have to use MS filters in addition to opacity to get it working there. It is two extra lines of CSS for each time opacity is used, see this article on how to do it: quirksmode.org: opacity – IE compatibility note
  • The CSS3 transitions effects degrade gracefully. IE support will be in IE10, prefix not necessary (source).


Jun 19 2012

RICcreator – pugixml

Category: Lego,Mindstorms,Programs,RICcreator,SoftwareSpiller @ 01:22

Since I’m not working actively on RICcreator in the moment, not much have happened the last few months, however I just rewrote some terrible code which was not safe. RICcreator would crash if the settings.xml file is formed differently than expected, so when a new version changed the format, it would crash if the old .xml file was kept.

XML handling

The XML parser previously used was rapidXML which promises great performance, and since I want to do some game related programming with XML I wanted to learn the API. However as I tried to use it with RICcreator I quickly realized it was rather tedious to work with. So I slacked on the implementation. Most importantly, I didn’t do any validation and simply chained the node lookups. So for example to get to the “settings” node in the “RICcreator” node I did this:

doc.first_node( "RICCreator" )->first_node( "settings" )

However if first_node() can’t find the node it returns NULL and in case of this the second call will try to dereference a NULL pointer and crash the application. To avoid this it should have been done like this:

xml_node<>* root = doc.first_node( "RICcreator" );
if( root ){
  xml_node<>* settings = root->first_node( "settings" );
  if( settings ){
    //Process it here
  }
}

This is quite some code for a simple lookup, so as said I slacked. Adding nodes to a new document (when saving the settings) was even more tedious as you had to allocate nodes and then add them. (On the other hand, I couldn’t slack here.)

So I have been looking for a simpler C++ XML parser and recently I heard about pugixml. I like the API much better, it is also a lightweight parser and apparently even faster than rapidXML so I tried it out. The previous lookup would look like this in pugixml:

doc.child( "RICCreator" ).child( "settings" )

This doesn’t share the problem rapidXML has, because child() returns a “NULL” object on failure. The NULL objects functions all return another NULL object, so you can chaining like this is completely safe as long as you check the final result.

So I have rewritten all XML handling to use pugixml now and I’m quite happy with the result. The code is a lot prettier and most importantly, it shouldn’t be able to crash like before.

Other changes

The dithering have been changed to use Filter Lite instead of  Floyd-Steinberg, which produces nearly as good result but which is quite simpler (and therefore faster).

A fun addition is grayscale importing support. If you want to toy around with grayscale images on your NXT, RICcreator makes this easy by letting you import the same image several times with different thresholds in one step.

The Number opcode is now no longer aligned to multiples of 8, as this limitation has been removed in the enhanced firmware.

A few bugs have been fixed and it should be possible to compile in Visual Studio again. (I haven’t checked after rewriting the XML stuff though.)

Download

Revision 165 win32: RICcreator rev. 165 – win32.zip

Revision 165 source:  RICcreator rev. 165 – src.zip

Tags: , ,


Mar 02 2012

Multi-monitor wallpapers

Category: SoftwareSpiller @ 23:18

I have been messing around with my monitors and portrait mode and I want to try out this setup for a while and see how it goes. Creating a dual-monitor wallpaper for Windows 7 on this particular setup manually is fairly tricky so I’m going to share how to do this with Gimp.

Dual-wallpaper on my monitors

I’m going to walk through a rather difficult case here, having screen space to the upper left of the main monitor and making a single image span across while taking in account the monitors real world position. If you just want to have a different wallpaper on your two normally aligned monitors it is much simpler.

Specialized software to do this

If you don’t want to go through all this trouble there are software out there to do most of the work for you. A open-source alternative is Duel Wallpaper from the Dual Monitor Tools software package which can be found on SourceForge: http://dualmonitortool.sourceforge.net/dualwallpaper.html

Also, according to addictivetips, Windows 8 will have at least some support for wallpapers on multiple monitors.

Telling Windows the screens relative positioning

Before starting this you should ensure that Windows know how the two monitors are positioned to each other, as this will affect how the wallpaper has to be done. You can do this by right-clicking on your desktop and click “Screen resolution”.

Windows monitor dialog

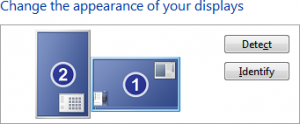
Notice that you can drag the monitor icons to match how the screens are positioned in real life. This affects how your mouse, windows and wallpaper wraps over to the other monitors, so make sure this is correct if you have differently sized monitors.

If your monitor´s stand allows you to adjust the height of the monitor then it is easier just to make a rough positioning in Windows and then adjust the monitor height to align it precisely.

Understanding Windows 7 wallpaper positioning

There are 5 modes: Fill, fit, stretch, center and tile. The first four will use the same wallpaper on both monitors which makes them unusable for this. The tile option however is based on the main monitor´s upper left corner and repeats from this point and continues repeating onto the other monitors while respecting its relative positioning as explained in the previous step.

That means that if you have two 1280×1024 px monitors side by side showing a 2560×1024 px wallpaper, the main monitor will show the area from 0x0 to 1179×1023 px and the secondary monitor will show the area from 1280×0 to 2559×1023 px.

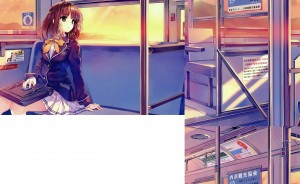
However if the secondary monitor is to the left of the main monitor, it will still display the right side of the wallpaper! This is because the left monitor is showing the tile left to the main monitor, which is illustrated below with my monitor setup:

How wallpapers tile on multiple monitors

So when you have to create your wallpaper, you have to make sure that the resolution is large enough to make sure that two monitors are not going to show the same area. Secondly you have to consider which areas are going  to show up on which monitor.

Creating a monitor mask

When you having a more complicated screen setup like shown above it is useful to create a mask showing the areas will be shown on the screen and how they are positioned with pixel accuracy.

First, press Print Screen to take a screen shot. Press Ctrl+Shift+V in Gimp to create a new image containing the screenshot. You should now have something like this:

Screenshot showing black areas

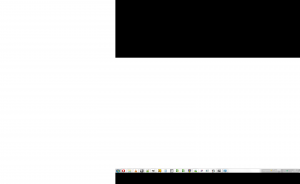
Notice how the areas which are not covered by your monitors are pitch black. Next, make sure that the image has an alpha channel by right-clicking on the layer and clicking “Add Alpha Channel”. (If it is disabled, it already has one)

Screenshot of rightclick menu

Now we want to remove everything except the black areas. To do this, use the Fuzzy Select Tool to select all the black areas. To select more than one area, simply click while holding Shift to add another area to the existing selection.

When done, invert the selection by clicking “Select->Invert” (or by pressing Ctrl+i) so that everything except the black areas are now selected. Then press Del to delete everything in the selection which should now become transparent like this:

Screenshot of finished mask

Taking physical position into account

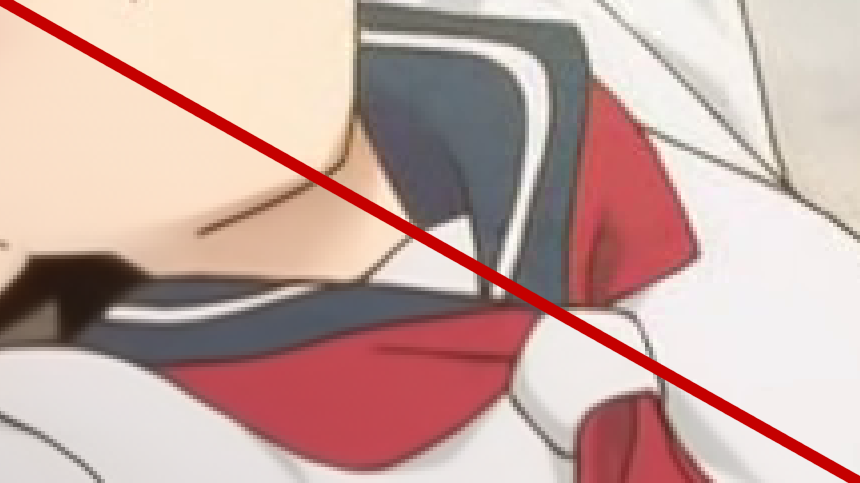
All normal monitors have an edge all around the screen which makes it impossible to avoid a small gap between each monitor. This makes everything jump a small distance every time something transitions from one screen to another. This isn’t too apparent when it moves horizontally, however it if is diagonally is is a different story as you can see in the following photo:

A photo of a diagonal going from one monitor to another

To get the best results you should takes this gap in account when creating your wallpaper. So find your ruler and start measuring!

When you have found the distance between the monitors we will have to convert this distance into pixels. Since I wasn’t completely sure which PPI my monitor was, I took the low-level approach and created a 10 cm wide image:

Screenshot of the advanced settings in the New Image dialog

Using my ruler I measured the width of the created image on the screen. When it didn’t match, I adjusted the PPI in the advanced settings a bit and created a new image until I found the correct PPI. Once I found it, I created a new image using the width I measured the gap to be using that PPI setting and used the dimensions of the image in pixel as a converting tool. (Interestingly enough, it ended up being 94 PPI.)

To finish your monitor mask, add this new information to it:

Finished monitor mask

You only need to make this mask once so make sure to save it somewhere safe so you can reuse it next time you want a new wallpaper.

Creating a wallpaper

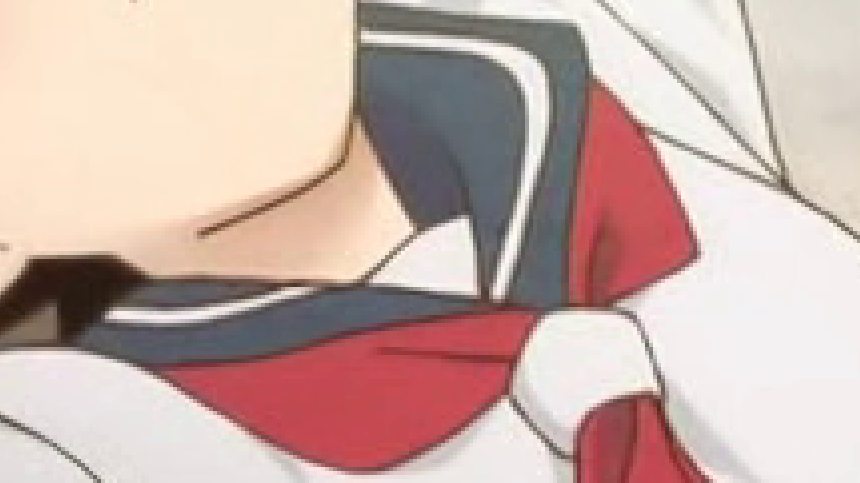
Now the fun finally starts. Find an image and resize and crop it so it has the same dimensions as your monitor mask and place your monitor mask on top of it like this:

Image with monitor mask on top

The few next (and last!) steps will, based on this image, create the wallpaper image for Windows. As said before, the parts of the image will show up on different screens so this is where the monitor mask comes in handy.

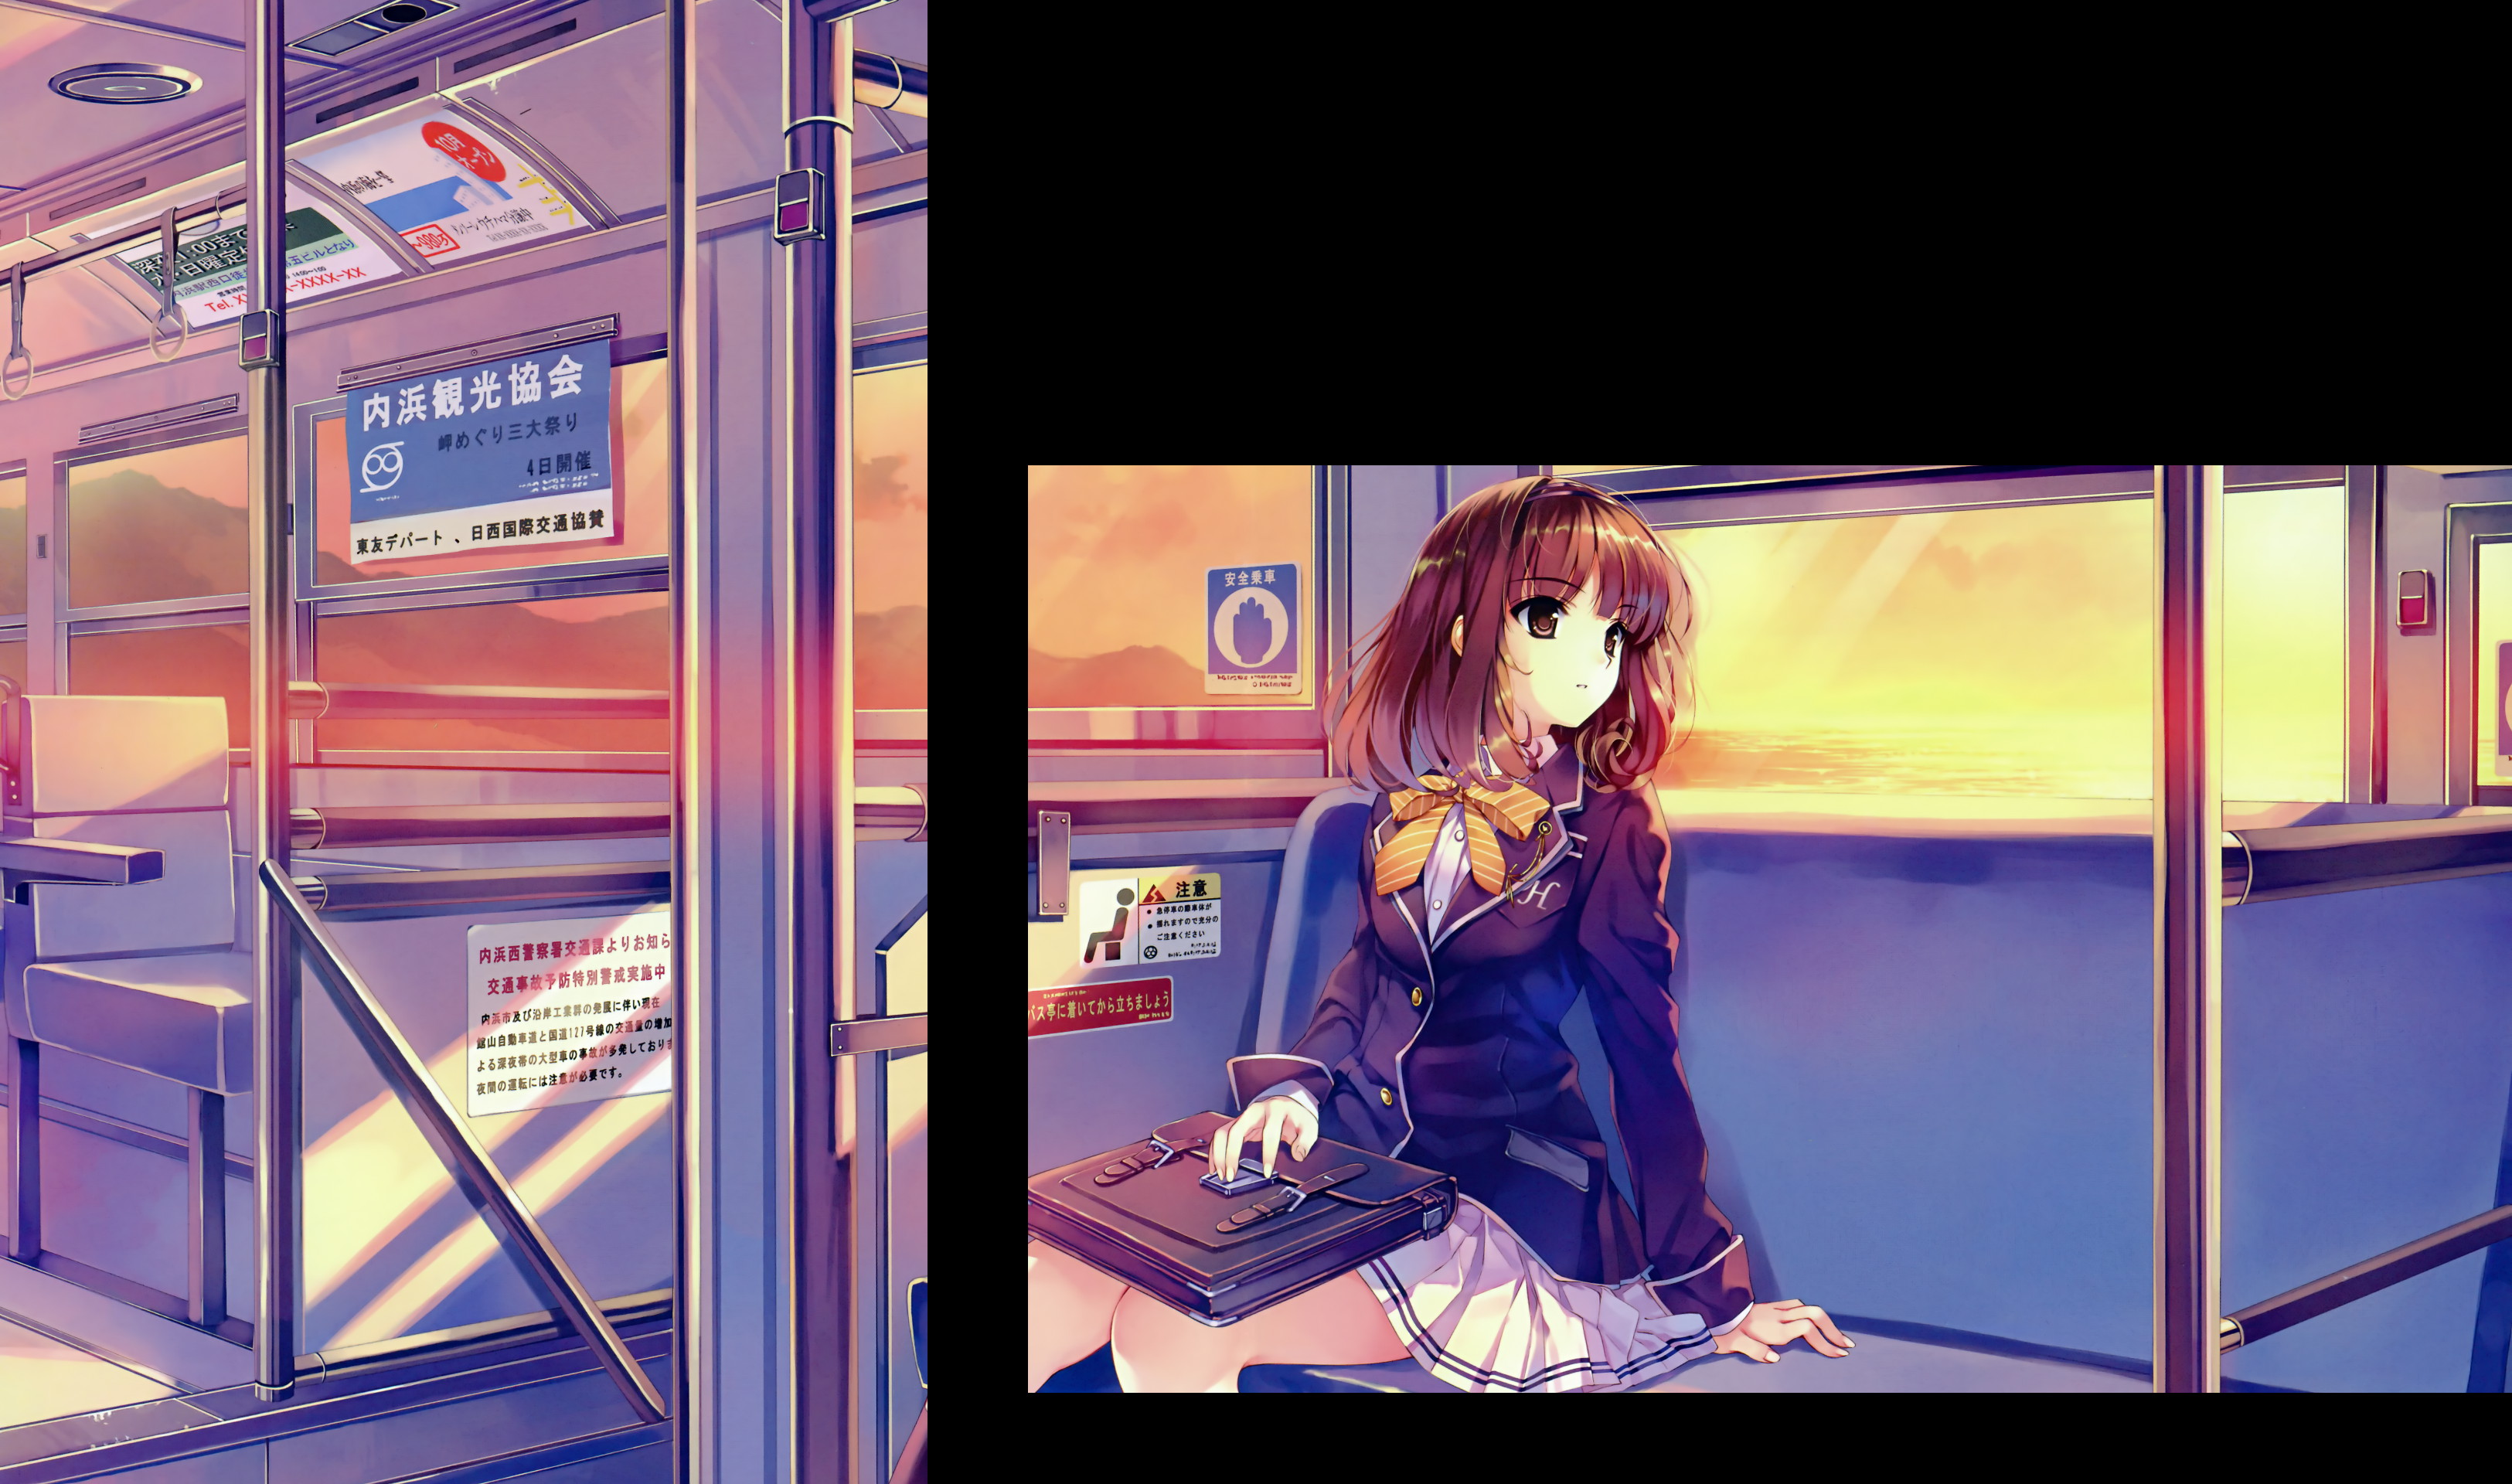
The image needs to be at least the same size as your screenshot. The rules are simple. In the upper-left corner you place the area which is going to be shown on your main monitor. For areas to the right you add it right to the right of the main monitor. For areas to the left you add it to the right edge of the image, moving towards the left side. For areas below you add it right below the main monitor however for areas above you add it at the bottom edge of the image, moving upwards.

The result in my case looks like this:

The wallpaper image

Conclusion

Windows doesn’t really take multiple monitors in account and this shows up here too. Just making a simple wallpaper like this is a bit of work and generally using the third-party software is probably the best way for most people.

The but is that I’m not sure if it is possible to properly take the gap between the monitors in account with the third-party tools.

For most monitor setups doing it manually should be a breeze however and even with this kind of setup it is not too bad once you tried it a couple of times. It would have been much easier if Windows had used the upper-left corner of the combined monitor area instead though.

Update:

I thought that there was something looking wrong and there was… My monitors are standing at a slight angle to each other and this is making the perspective slightly off. Seriously, this is starting to become rocket science…

Tags: , , ,


« Previous PageNext Page »